


Prompt Wars: The Adaptive Cards Strikes Back
June 2025


As a Prompt Jedi Master, you can use the Force to make life easier. But don't Prompts sometimes tempt you to the dark side? Perhaps you still need to master the skills that keep you on the good side. Not everything looks good in Copilot Studio Agents with Prompts. Trust the power of Adaptive Cards! How do you do that? We'll show you!
This is the start of a cool Copilot Studio series with Craig White! Look forward to much more - and probably even more Star Wars references, right, Craig? 😁

Table of Content
Meet the PriceWise Agent!
Why we shouldn’t trust Prompts fully - Meet Adaptive Cards!
Adaptive Cards together with Agent Flows: Bro’s for Life!
See how it works live
Download the solution and other references
1. Meet the PriceWise Agent!
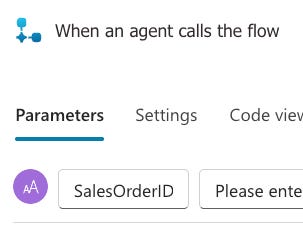
To demonstrate the added value of Adaptive Cards, we built an agent in Copilot Studio. This agent, called PriceWise, helps us perform typical CRUD1 operations in Dataverse without accessing Dataverse directly. We will start with the Conversation Start topic. It begins with a nice greeting and a cute bot.

To build the best user experience, we let the user enter as little as possible. With the Ask a question action, you can provide a list that the user can select from.
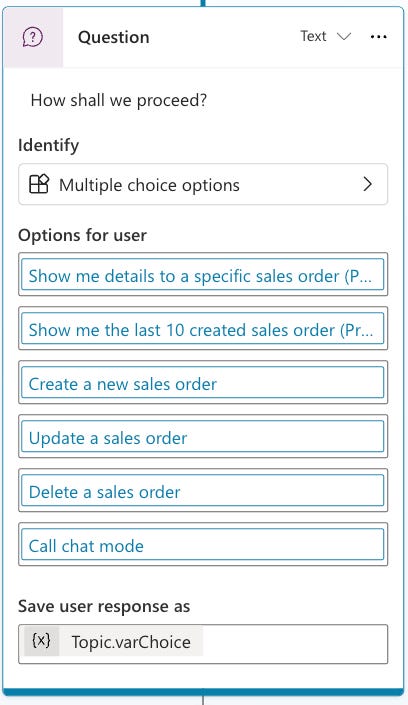
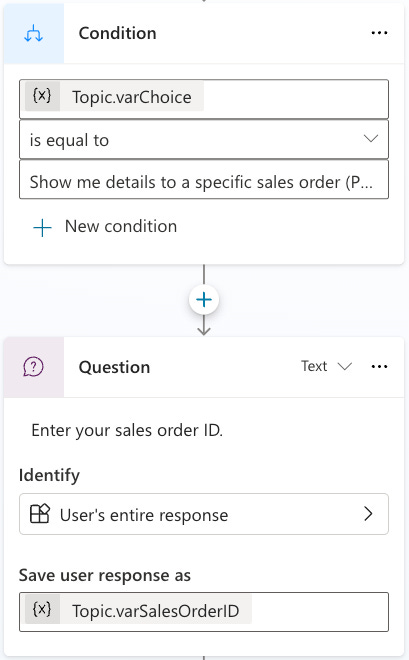
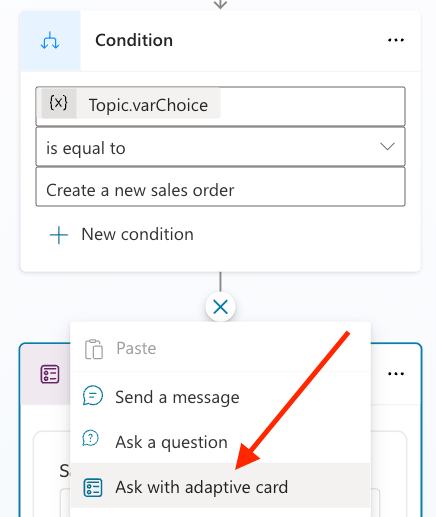
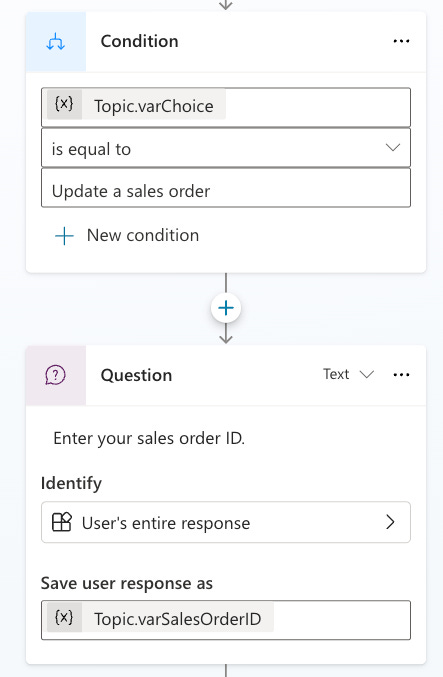
With the Add a condition action, you can now build your respective branch. Let's do that! The first condition is Show me details of a specific sales order (Prompt).
We ask the user for the sales order ID.
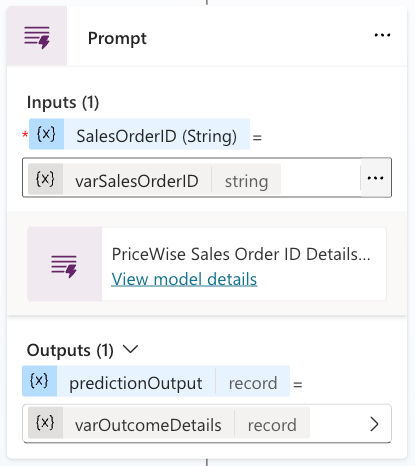
We pass the entered value to our Prompt.
We hope2 for a great layout as a result. Depending on how strong your Prompt Force is, the result can range from incredibly great to impossibly terrible.

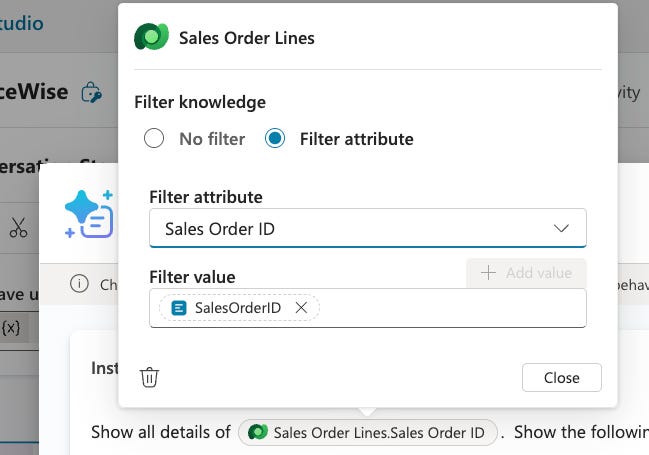
By now, you should be asking yourself: Why do we use Dataverse? Because it's cool, of course! Above all, it's useful in Prompts. The Dataverse table is also very simple. Nice of you to ask! 😁

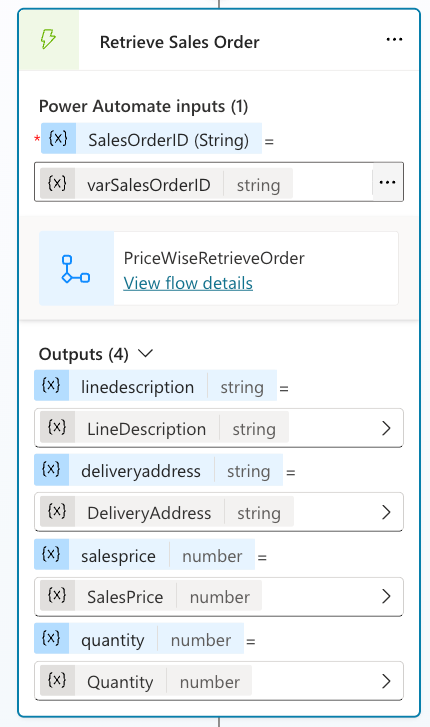
If we ask for a sales order ID 9999, the agent will receive the following result from the prompt.

The result is impressive, but Quantity is squeezed in. Depending on the computer, the result can look different, for example.

2. Why we shouldn’t trust Prompts fully - Meet Adaptive Cards!
As you can see from the previous example, Prompts can deliver different results. This is no surprise, since they are subject to the power of arbitrariness, also known as Generative AI. The Large Language Model decides the final output depending on the Prompt and its mood. However, there are better ways to display information in a way that suits you best. Let's dive into the world of Adaptive Cards!
When building the Agent for the first time, you probably don't have any test data (or you had to create some because Chapter 1 doesn't work well without it 😉).
After landing in the Create a new sales order condition, create an Ask with adaptive card action.
There are two ways to go here: you either like JSON or you like Power Fx/Formula. Based on our experience so far: Use JSON! It works more smoothly, and you can use the designer. Although Formula is quite cool, it has two disadvantages, some of which are serious!
You can switch from JSON to Formula, but not the other way around, without losing all your code! 😱
If you create fields with Formula, sometimes it doesn't create outputs, which is clearly a bug, and you need them as parameters for your Agent Flows aka Power Automate Flows.
Click on Edit adaptive card.
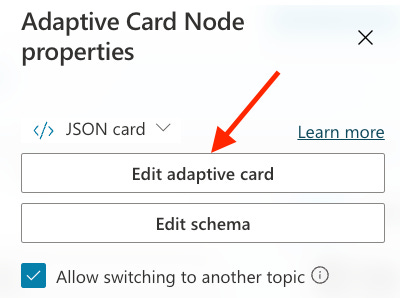
Enter the wonderful world of the Adaptive Card Designer! 🤩
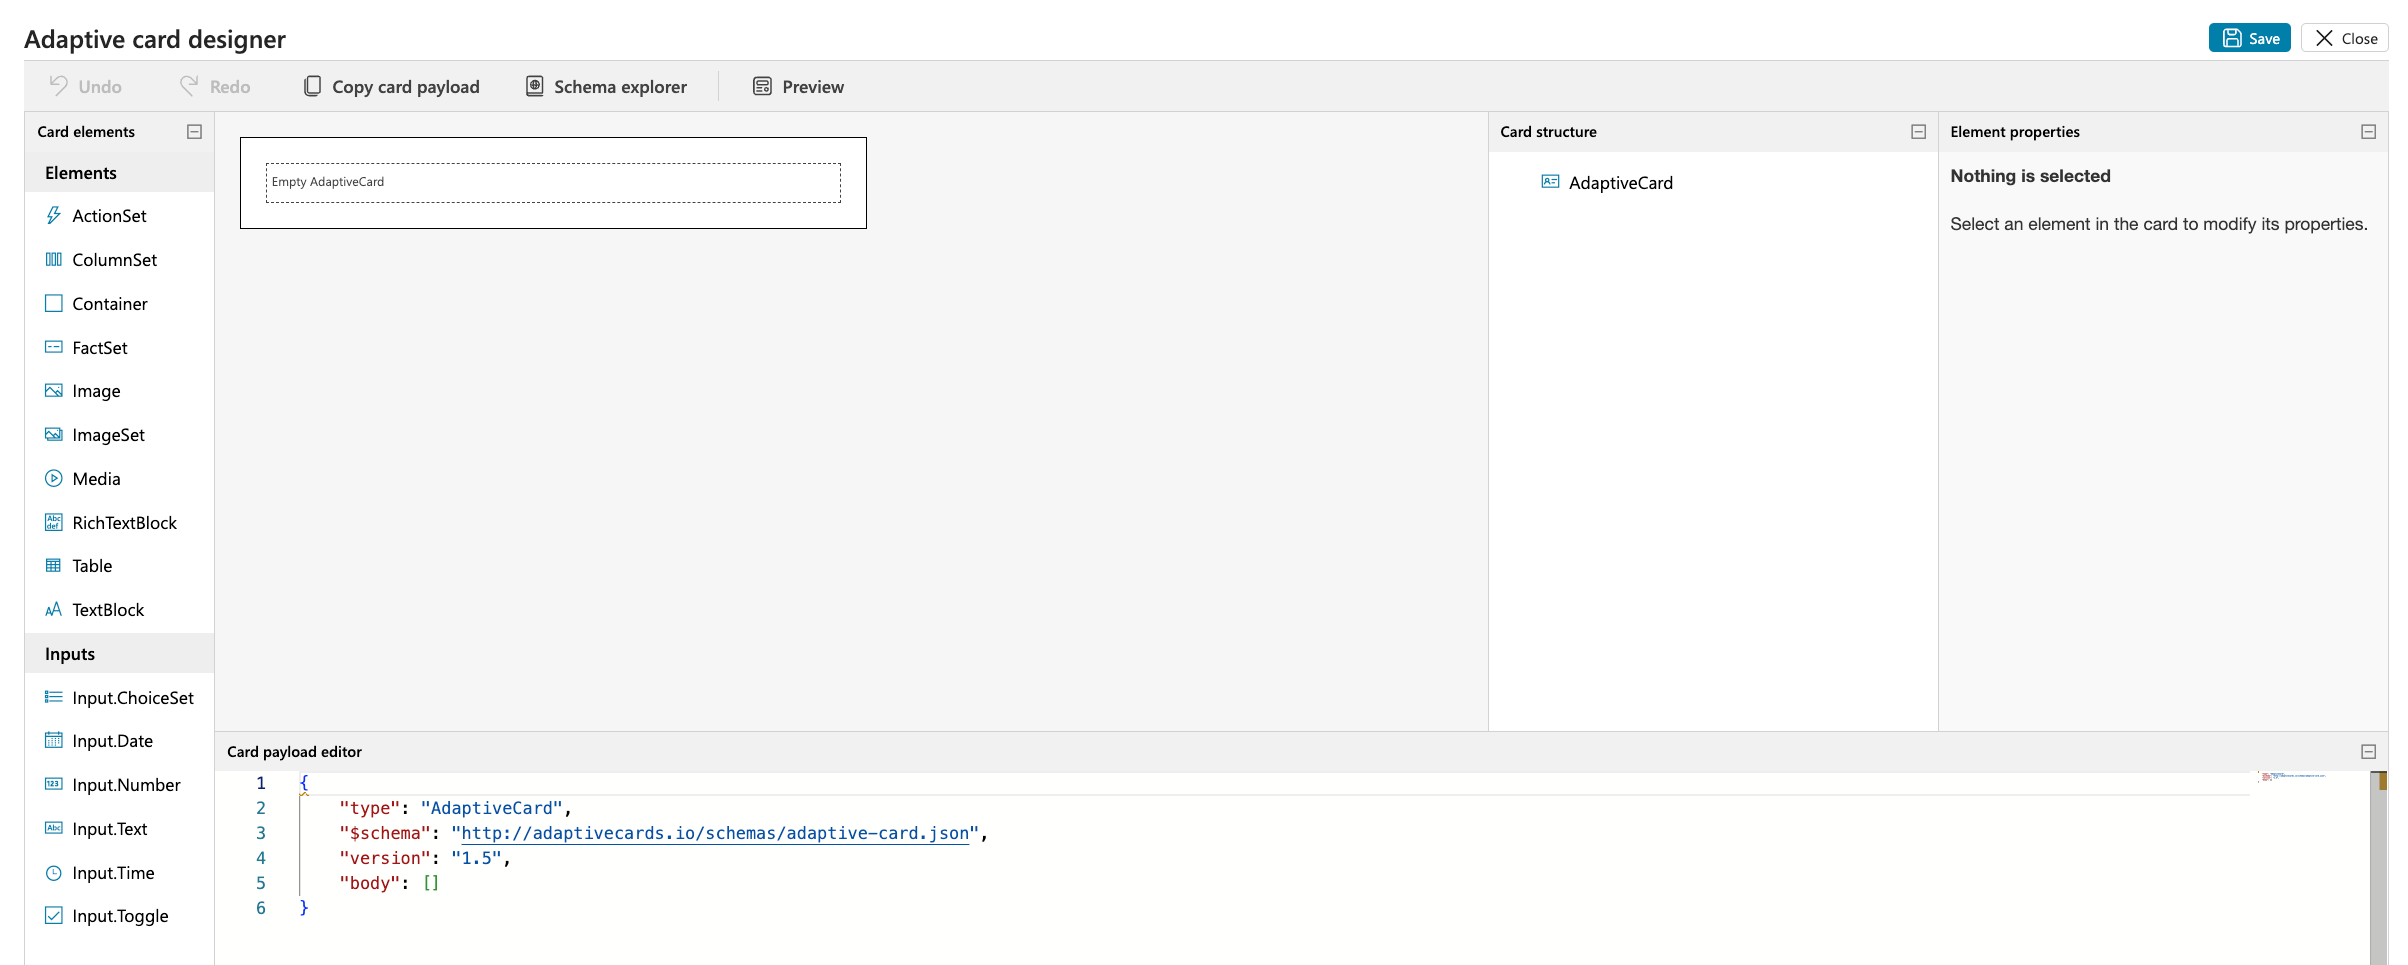
Copy the following code in the Card payload editor.
{
    "type": "AdaptiveCard",
    "$schema": "https://adaptivecards.io/schemas/adaptive-card.json",
    "version": "1.5",
    "body": [
        {
            "type": "Input.Text",
            "label": "Sales Order ID",
            "id": "varSalesOrderID"
        },
        {
            "type": "Input.Text",
            "label": "Line Description",
            "id": "varLineDescription"
        },
        {
            "type": "Input.Number",
            "label": "Sales Price",
            "id": "varSalesPrice"
        },
        {
            "type": "Input.Number",
            "label": "Quantity",
            "id": "varQuantity"
        },
        {
            "type": "Input.Text",
            "label": "Delivery Address",
            "id": "varDeliveryAddress"
        },
        {
            "type": "ActionSet",
            "actions": [
                {
                    "type": "Action.Submit",
                    "title": "Create",
                    "style": "positive",
                    "associatedInputs": "auto"
                }
            ]
        }
    ]
}
Now it creates the following output in the graphic designer.
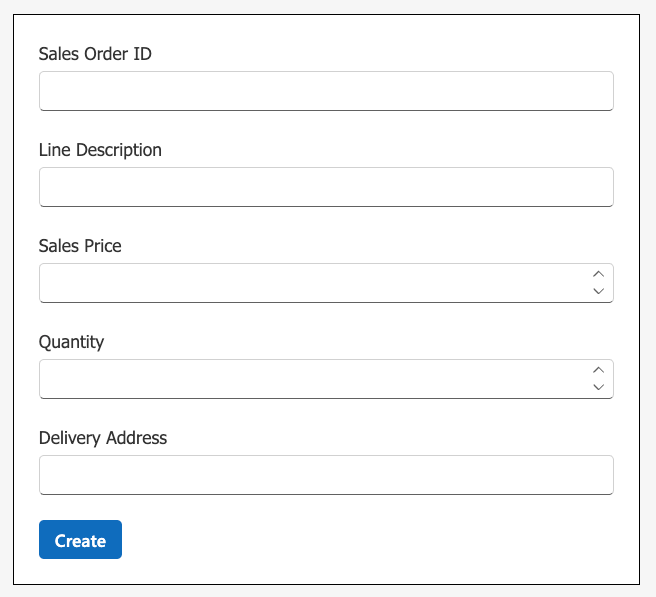
We used the Card Elements Inputs, specifically Input.Text and Input.Number, to enable clear input. We also created a Create button and used an ActionSet/Action.Submit. As soon as you click Create in the live version of the Agent, we save the values and pass them to our Agent Flow.
Note: There is a link to the Schema Explorer in the reference block, which is useful for getting more out of Adaptive Cards. 🤗
3. Adaptive Cards together with Agent Flows: Bro’s for Life!
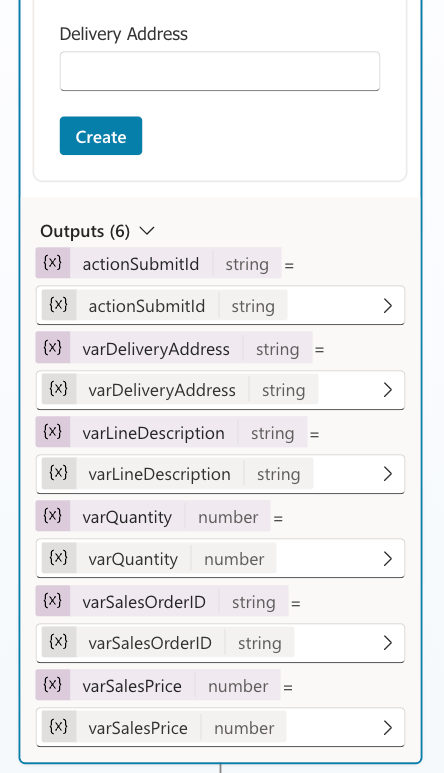
From the previous chapter: Create variables for the outputs and pass them to the Agent Flow.
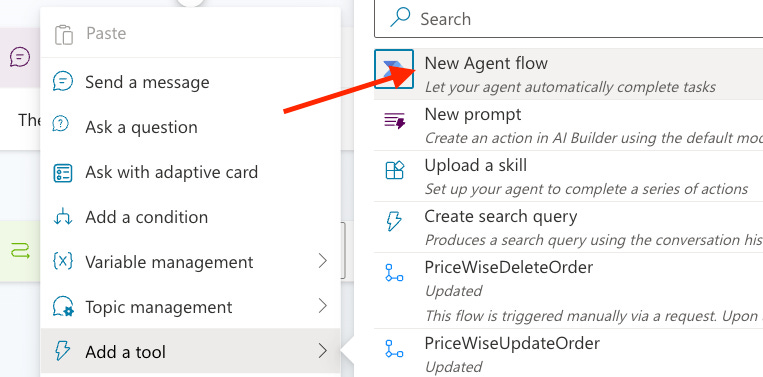
Wait, which agent flow? That's right, we're creating it now! 😁 With the Add a Tool/New Agent Flow action. You will then be redirected to the Agent Flow Builder.
The Create a sales order flow is pretty simple. Create the parameters that you can pass later.
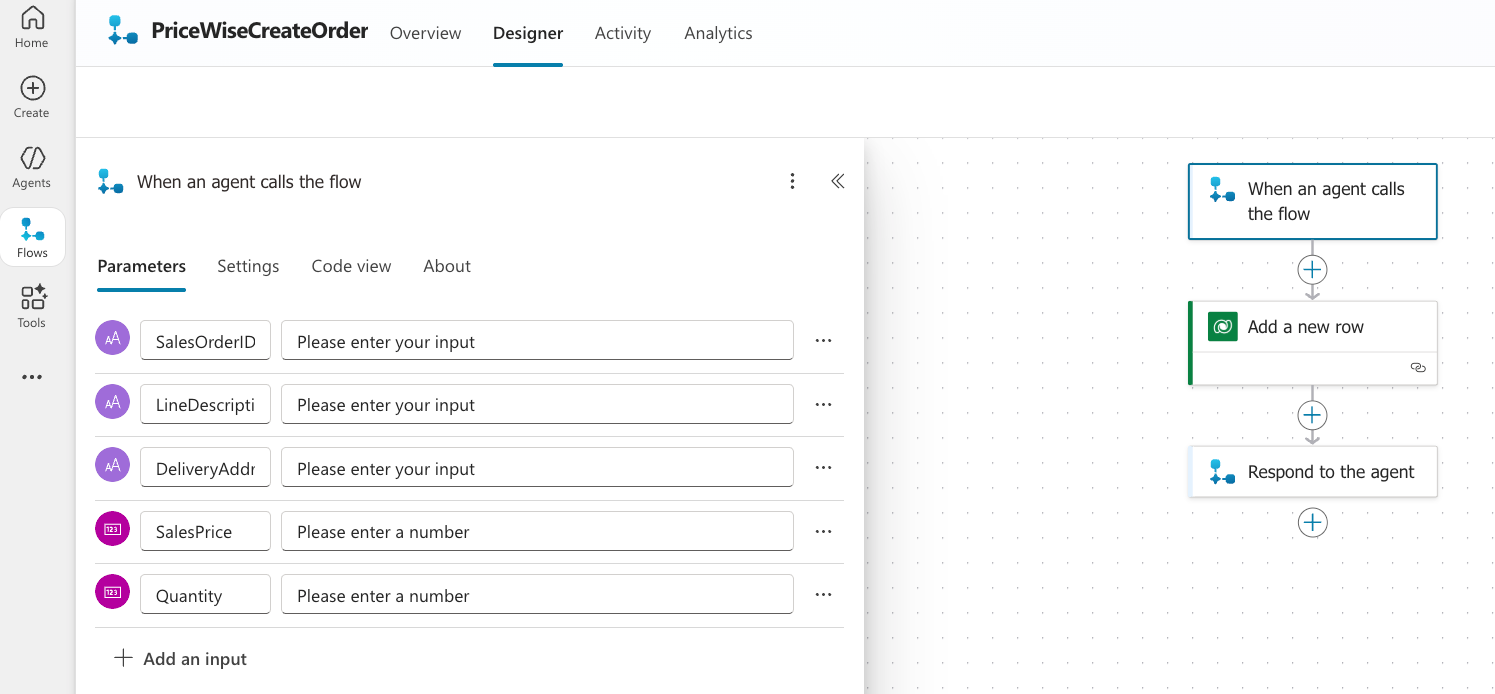
In the next step, use the Dataverse action Add a new row and pass the variables to create the row/record.

If you want, you can pass an output back to Copilot Studio. This is definitely worthwhile for a project, but it's not essential here.
Save the draft, change the name from Untitled to something meaningful like “PriceWiseCreateOrder” and then publish it. Return back to Copilot Studio and to your topic.
Note: If you don’t publish it, you can’t see it in Copilot Studio in the Tools list!


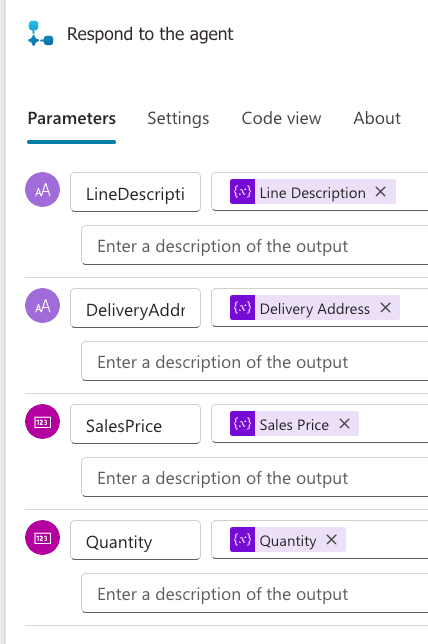
Finally, pass the output variables from the Adaptive Card action to the Agent Flow.

Has the sales order now been created? You have a Prompt with which you can check this. 😉
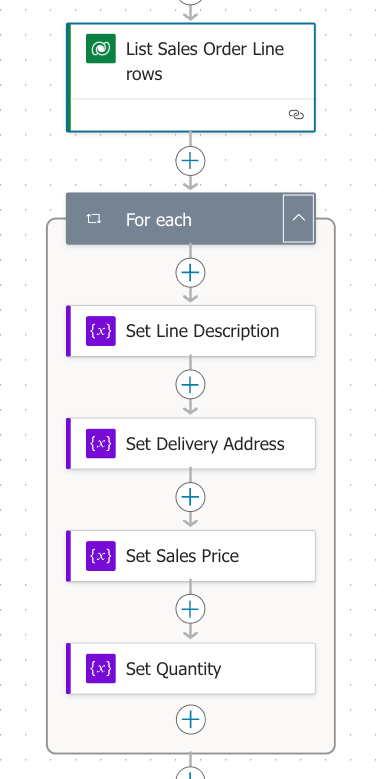
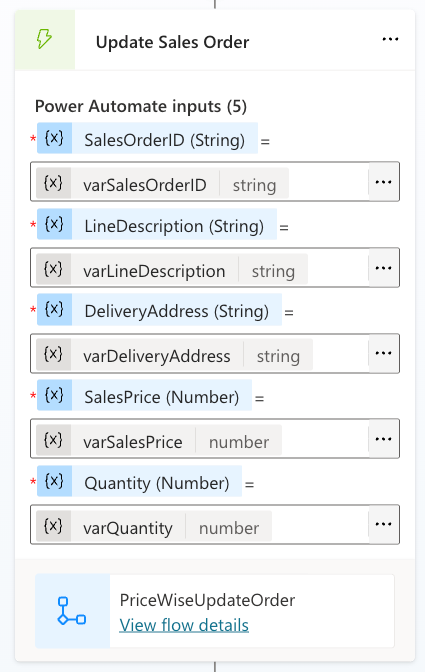
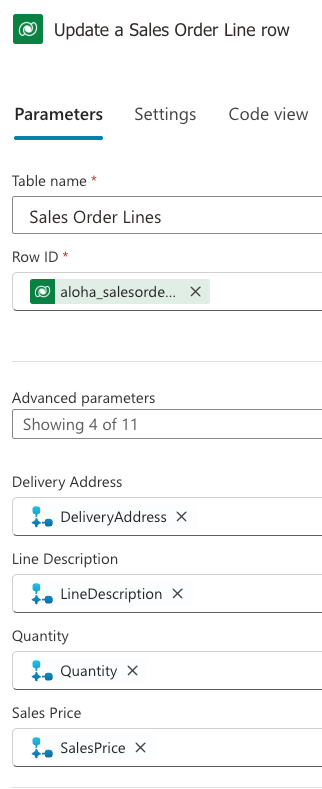
How can you update or even delete sales orders? In principle, it works in the same way. We'll post the pictures here so that you know roughly how to do it, or you can download the solution straight away (see last chapter).


Note: The following code is in Formula and not JSON! Based on the experience, use JSON, I just couldn't convert the code back with the on board tools. 😁
{
  type: "AdaptiveCard",
  '$schema': "https://adaptivecards.io/schemas/adaptive-card.json",
  version: "1.5",
  body: [
    {
      type: "Input.Text",
      label: "Line Description",
      id: "varLineDescription",
      value: Topic.LineDescription
    },
    {
      type: "Input.Number",
      label: "Sales Price",
      id: "varSalesPrice",
      value: Topic.SalesPrice
    },
    {
      type: "Input.Number",
      label: "Quantity",
      id: "varQuantity",
      value: Topic.Quantity
    },
    {
      type: "Input.Text",
      label: "Delivery Address",
      id: "varDeliveryAddress",
      value: Topic.DeliveryAddress
    },
    {
      type: "ActionSet",
      actions: [
        {
          type: "Action.Submit",
          title: "Update",
          style: "positive",
          associatedInputs: "auto"
        }
      ]
    }
  ]
}


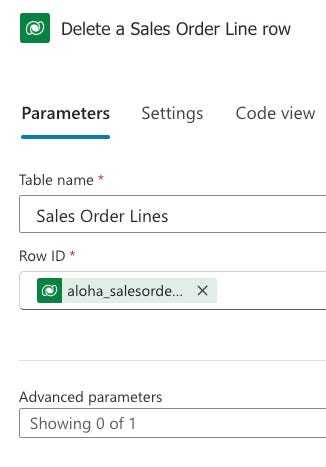
And last but not least, here is the Agent Flow to delete a row/record.


4. See how it works live
5. Download the solution and other references
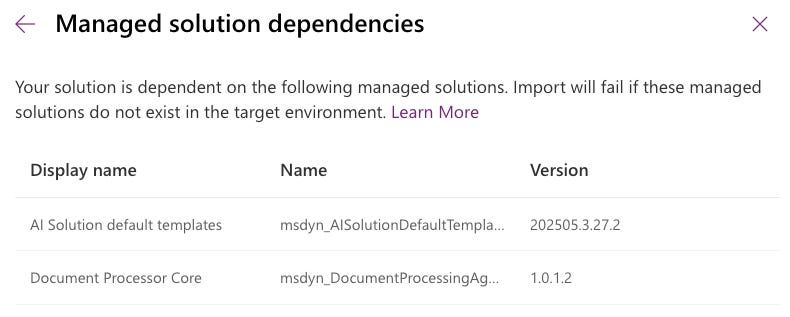
Here you can download the solution. It’s unmanaged, so you can import it into any kind of DEV environment. Make sure you have enough credits for Copilot Studio, access to Power Automate and Dataverse Premium.
Unfortunately, the solutions have a dependency. In our system, the Document Processor Agent is installed, which is unfortunately included. You can also install this so that it should then be possible to install the solution.

Download the solutions here.
References
We recommend this to learn more about Adaptive Cards.
Our friend Angeliki Patsiavou has created some awesome Adaptive Cards blog posts (including a fancy Back to the Future theme 😍). Check them out!
.
.
.
.
.
.
.
CRUD stands for Create, Read, Update and Delete
Always remember: Hope is not a management tool 😁